Easy Veggie Sushi


Sushi is one of those foods that has always intimidated me (and I’m talking about just veggie sushi). It always seems a bit tricky to make, rolling on a bamboo sheet and making sure the rice is cool enough before, and trying to avoid a sticky mess… I know, not the best cook in the kitchen. But, it doesn’t have to be over-complicated in order to produce a delicious final product. Take sushi for instance; it is simple in theory, but can also be simple in practice. It’s as easy as gathering the ingredients for veggie sushi, then making a super simple roll without any tricks—just the ingredients and some parchment paper for rolling.

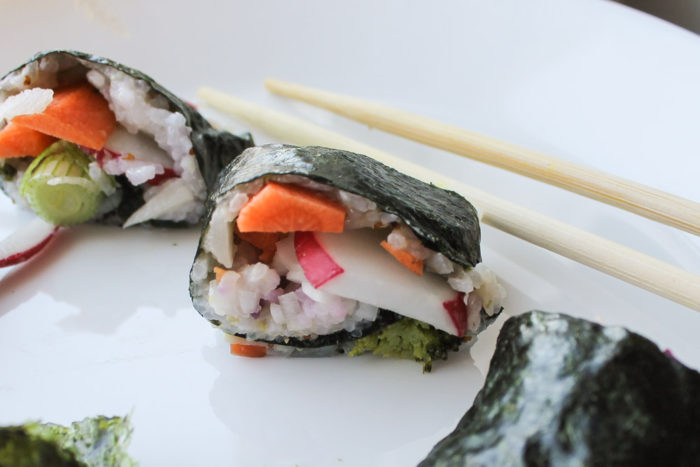
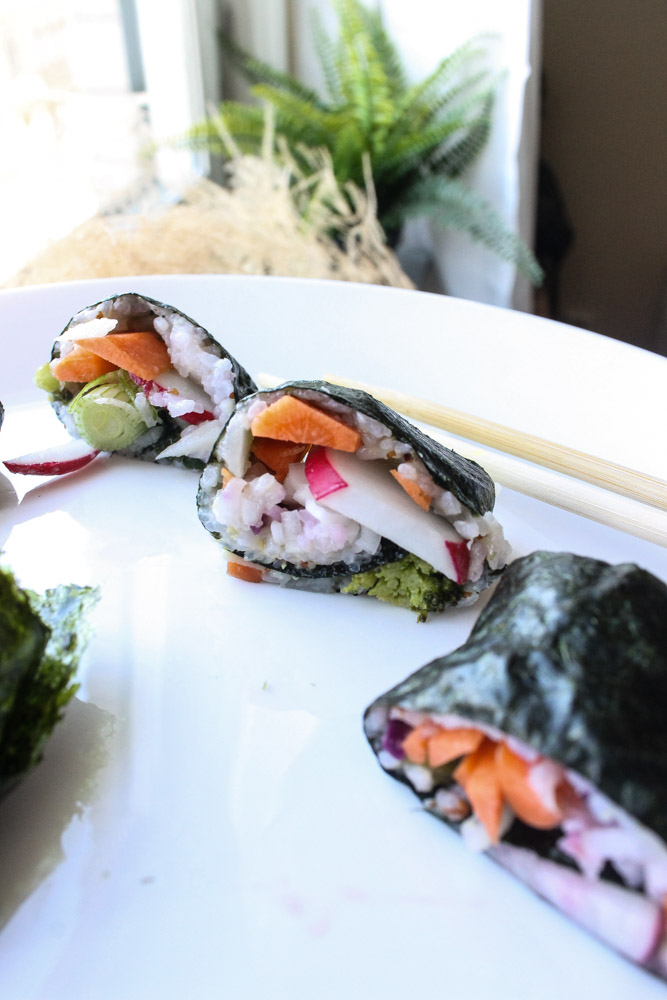
After trial and error, I found a simple method for low-maintenance sushi. It doesn’t have to look pretty or roll up nicely into the perfect roll. What is most important is the taste and texture—soft and sticky from the rice, crunchy from radish and carrot, sweet and salty from the tangy sauce and a squeeze of lime juice. So if you are ever in the mood to make some light and refreshing veggie sushi, give this recipe a try. It is super simple to make, vegan, and free of common allergens. But, most importantly, it tastes delicious!

Easy Veggie Sushi (V & GF)
Print
Ingredients
  1. Nori sheets
  2. Sushi rice, cooked and allowed to cool in a bowl
  3. 1 tsp. apple cider vinegar or rice vinegar
  4. Dash of salt
  5. Sliced carrot
  6. Spring onion, diced
  7. Optional sliced radish
  8. Optional roasted red pepper, sliced
To make the rice
  1. 1/2 cup dry white sushi rice or jasmine rice
  2. 1 cup water
  3. Pinch of salt
  4. 1 tbsp. rice vinegar  (or vinegar of choice)
  5. 1/2 tbsp. maple syrup (optional)
To make the sauce
  1. Juice from 1/2 lime + 1/2 tsp. lime zest 
  2. 2 tbsp. tamari (or coconut aminos for soy-free)
  3. 1 tsp ground ginger or 1 tbsp fresh minced ginger
  4. 1/4 tsp. chilli powder
  5. 1 tbsp. mustard (spicy or mild)
  6. 2 tbsp. almond butter
  7. 1 tbsp. maple syrup
  8. Salt and pepper to taste
  9. Optional sesame seeds
Instructions
  1. To make the rice: Start by making the sushi rice according to the instructions on its packaging, but generally twice as much water as rice is a good amount. Rinse the rice, add water to a pot, then bring to a boil; add rice. Cook for around 10-15 minutes. Drain out any excess water then add to a medium-sized glass bowl along with 1 tbsp. rice vinegar, a dash of salt, and optional 1/2 tbsp. maple syrup. Let cool until rice reaches room temperature. While you wait for the rice, it is time to assemble the veggies and make the sauce by whisking ingredients together until a creamy sauce forms.
Chop then Roll
  1. Chop the radish into slices, slice the carrots into strips, and dice the spring onion. Meanwhile, add the cooled sushi rice to a nori sheet laid flat on a piece of parchment paper (hold the sides of paper down with jars or something heavy) and spread the rice out thin and evenly. Next add sliced veggies in a strip of the middle of the rice. Pour some sauce over and a dash of lime. Take the top of the roll and start folding it over and rolling it until you get to the bottom of the sheet. Slice widthwise into individual rolls with a sharp knife. Serve with extra sauce to dip and add an optional sprinkle of sesame seeds. Enjoy!
Simple Sweets & Treats https://simplesweetsandtreats.com/


Veggie Quinoa Sauté + Beet Sesame Sauce

Vibrant beet sesame sauce is the star of this bowl. Smooth and creamy with subtle flavors of garlic and a tangy sweetness, the sauce tastes amazing when spread over sautéed mushrooms, onions, and beets. This sweet and savory element elevates a regular veggie bowl to a whole new level. When drizzled over the quinoa and sautéed veggies, the creamy sesame sauce enhances their natural taste and texture.

Beets are truly a wonder food — incredibly high in iron and betalains (a phytonutrient with anti-inflammatory and detoxifying properties). Basically, they are packed with nutrients that increase health, which are much-needed during these winter months!  Add nutrient-rich beets to broccoli, protein-packed quinoa, peas, and mushrooms, and you will have a nutrient-rich, wholesome bowl of goodness.


Veggie Quinoa Sauté + Beet Sesame Sauce
Print
Quinoa
  1. 1/2 cup dry quinoa
  2. 1 cup water
Beet Sesame sauce
  1. 1/4 cup tahini
  2. 1 garlic clove, minced
  3. Juice from 1/2 a lemon
  4. 2 tbsp. leftover cooking water from the beets
  5. Salt and pepper to taste
  6. 1 tbsp. maple syrup
  7. 1/4 cup water
Veggie Sauté
  1. 1/2 cup vegetable broth
  2. 1/2 cup slices onions
  3. 1 cloves garlic, minced
  4. 2 beets, boiled in a large pot for 20 minutes, then peeled and sliced
  5. 1 cup frozen or fresh peas
  6. 1 cup sliced mushrooms
  7. 1/2 tsp. oregano
  8. Salt and pepper to taste
Instructions
  1. Quinoa: Start by rinsing the quinoa in a mesh strainer, then add it to a pot with the 1 cup of water once the water is boiling. Allow to simmer over low heat for around 10-15 minutes. Once the quinoa has absorbed the water and is fluffy, remove from heat and cover. Allow to cool for 10 minutes.
  2. Beet Sesame Sauce: Combine tahini, garlic, beet juice, and lemon juice; mix then add salt, pepper, maple syrup, and water. Mix thoroughly until smooth and creamy sauce forms (add more water for a thinner sauce).
  3. Veggie Sauté: Start by adding vegetable broth to a skillet along with onions and minced garlic. Sauté for a few minutes on medium heat until garlic and onions become softened, adding more water if it becomes too dry. Add the beets (boiled ahead of time, then peeled & sliced) along with peas and mushrooms. Mix and sauté until vegetables become tender, around 5-10 minutes. Sprinkle with oregano, and salt & pepper to taste. Add the cooled quinoa to this mixture and toss. Top with the pink beet sauce and enjoy! Optional: serve the quinoa veggie stir fry over greens and add more herbs to taste.
Simple Sweets & Treats https://simplesweetsandtreats.com/

Veggie Quinoa Sauté + Beet Sesame Sauce

Detox Red Lentil Soup

This detox red lentil soup is the perfect filling yet detoxing mixture of nutritious ingredients for when you are feeling sluggish and weighed down during the transition from winter to spring. Thanks to red lentils, this detox veggie soup is hearty yet light at the same time with protein-packed lentils that keep you full and are also recommended for detoxing the body because they are easily digested. On top of lentils, mineral rich pumpkin seeds are a delicious addition for crunch and healthy fats. While antioxidant and vitamin C rich carrots and red peppers provide extra nutrition and flavor along with nutrition-packed garlic, ginger, and bitter greens. Soaked in fragrant potent herbs and spices, this adds medicinal benefits and extra flavor. It’s the perfect colorful, healthy, and warming dish to cook during the dreary, cold days of spring in some parts of the world.

Detox Red Lentil Soup
Print
Ingredients
  1. 1/2 cup dried red lentils
  2. 2 cups water
  3. 2 carrots, chopped
  4. 1 red pepper, chopped
  5. 3 cloves of garlic, whole or minced
  6. 1 tsp. curry powder
  7. 1 tsp. paprika
  8. 1/4 tsp. ginger
  9. 1/4 tsp. rosemary
  10. 1/4 tsp. garlic powder
  11. 1/4 tsp. onion powder
  12. 1 tbsp. maple syrup or brown sugar
  13. 1/2 cup non-dairy milk such as almond, oat, or coconut
  14. 1/4 tsp. salt
  15. 1/4 tsp. pepper
  16. 1/4 cup pumpkin seeds for sprinkling on top
Instructions
  1. Start by rinsing lentils and soaking them for a couple of hours before (optional, but helps to cut down on cooking time). Boil the water in a medium pot, then add lentils and chopped vegetables and cook for around 10 to 15 minutes for soaked lentils and around 15-20 for non-soaked or until desired consistency is reached. Pour additional water over the lentils if they start sticking to the pot and stir as necessary. Add herbs and spices during the last 5 minutes of cooking time. Let cool, then sprinkle with additional salt & pepper and pumpkin seeds. Enjoy!
Simple Sweets & Treats https://simplesweetsandtreats.com/

Soothing Autumn Soup

Hello again! It has been awhile since I last posted, but I’ve been settling into a new country and lifestyle; this also means figuring out new recipes and cooking methods. As the season shifts into autumn and winter, I often make super simple soups — soups that only require one pot and a bunch of chopped veggies and spices. This soothing autumn soup is so simple that it hardly seems worthy of a recipe because it is more of a toss-everything-in-the-pot-and-wait kind of soup. :) Making use of seasonal ingredients is incredibly beneficial for your health, as the harvest foods of the season are perfectly packaged with the right nutrition to keep you warm and healthy during the wet and cold of autumn/winter. For instance, this soup contains beets, greens, garlic, sweet potatoes, whatever beans you choose, and a plethora of spices. Adding warming spices helps to increase circulation, warm the body, and aid immunity during cold and flu season. It’s especially soothing on a sore throat or cough. 

Packed with nutrition, beets are the star of this recipe, delivering plenty of vitamins and minerals such as vitamin C, folate, B6 and Thiamin. They also contain magnesium, potassium, copper, and manganese. Their rich red hue is due to naturally high levels of iron, making them a perfect food for those with anemia. An excellent blood builder, they also protect the immune system and cardiovascular system. Besides all the health benefits, beets are tender and sweet when cooked to a soft texture, making them the perfect addition to soups and stews (plus they give your soup a beautiful red color!). If you are not making homemade soups, then you must get started! Try out this soothing autumn soup or mix up the ingredients and make your own version. It’s a simple, satisfying, and hearty soup that is packed with nutrition!

Soothing Autumn Soup

Soothing Autumn Soup
Print
Ingredients
  1. 3 cups water
  2. 4 beets, chopped
  3. 2 sweet potatoes, chopped
  4. 4 garlic cloves, minced
  5. 1 can of beans such as white or black beans, drained and rinsed
  6. 1 tsp. curry powder
  7. 1 tsp. dried oregano
  8. 1 tsp. dried cilantro/coriander
  9. 3 tsp. soup seasoning
  10. 1 tbsp. maple syrup
  11. Pinch of salt and pepper
  12. 3 cups chopped greens
Instructions
  1. Fill a pot with three cups of water and bring to a low boil. Add the chopped vegetables, minced garlic, and beans of choice and let cook for around ten to fifteen minutes. Remove from heat. Add the spices, herbs, maple, and greens then let sit covered for about ten minutes. Top with additional salt and pepper and enjoy!
Simple Sweets & Treats https://simplesweetsandtreats.com/

Chocolate Brownies with Salted Caramel Icing (Allergy-Friendly)

How can one not love gooey, fudgey brownies? Add salted caramel to the mix, and said brownies become irresistible! As much as I love the everything salted caramel craze, these brownies were not intentionally made to become salted caramel brownies, but a magical accident happened (baking accidents are the best) and the type of sugar, vanilla and other icing ingredients transformed into caramel and voila! — Chocolate Brownies with Salted Caramel Icing were created.

Unlike sticky caramel that gets stuck in your teeth, this caramel icing is light and soft yet sweet and buttery. Dusted with a sprinkle of pink Himalayan salt, and the salty sweet perfection melds into the chocolate brownie layers. When drizzled on top of the brownie cake fresh from the oven, the salted caramel icing is able to melt into the hot brownie and mix with the chocolate chips to create a chocolate caramel swirl. Chocolate, caramel, and pink salt — the three ingreidnets to happiness.

While brownies are not exactly the epitome of health food, these brownies are somewhat better for you than the traditional brownie. They are made with plant-based and mostly unrefined ingredients. They actually happen to be grain-free, gluten-free, dairy-free, egg-free and nut-free. That’s a lot of allergies that you don’t have to worry about when making or consuming this sweet treat. This brownie recipe takes the trouble out of finding the perfect dessert to make for everyone; they are great for bringing to an event while avoiding harmful ingredients or potential allergens. Simple ingredients = simple chocolate and caramel taste. Plus, there’s the added benefit of high protein in this baking mix. Besides containing high quality ingredients, these brownies taste rich and decadent. Whip up a batch of these chocolate brownies with salted caramel icing for a fun and simple plant-based treat!

Chocolate Brownies with Salted Caramel Icing

Chocolate Brownies with Salted Caramel Icing
Print
Brownies
  1. 1/2 cup organic sugar
  2. 1/4 cup oil
  3. 1 tsp. vanilla extract
  4. 1/4 cup non-dairy milk or water
  5. 1/2 cup melted chocolate chips
  6. 1 and 1/4 cup flour of choice
  7. 1/4 cup cocoa or cacao powder
  8. 1 tsp. pink salt
Icing
  1. 1 cup organic powdered sugar
  2. 1/2 cup coconut sugar
  3. Sprinkle of pink salt
  4. Around 2 tbsp. nondairy milk or water (just enough until frosting reaches desired consistency)
Instructions
  1. Preheat the oven to 350 degrees Fahrenheit. Meanwhile, combine first four wet ingredients in a regular bowl and mix. Next add melted chocolate chips to the wet mixture and stir until just combined (a tip for quickly melting chocolate chips is to add hot water to the measuring cup with chocolate chips and let melt, then drain the water). Mix everything together, then add the dry ingredients and combine until batter forms. Add to a brownie pan lined with parchment paper, and spread the batter evenly. Bake for about 15 minutes. Once out of the oven, sprinkle on more chocolate chips and spread once they have melted to form the chocolate layer. Let brownies cool while mixing icing ingredients in a bowl. Drizzle icing on the brownies and top with pink salt. Bon appétit!
Simple Sweets & Treats https://simplesweetsandtreats.com/

Spiced Peanut Noodles

Peanut sauce is such an amazing creamy and nutty sauce used in Asian cooking that is made with ground roasted peanuts combined with spices. This is what creates such a smooth, rich sauce with lots of flavor. To make a simpler sauce inspired by authentic Asian peanut sauce requires just a few main ingredients that are common kitchen staples plus some mild spices.

In these spiced peanut noodles, a silky smooth peanut sauce coats ribbons of rice noodles. Thankfully, the sauce is simple to assemble with ingredients like creamy peanut butter, maple syrup, and some spices. It has a deep, nutty flavor that melds wonderfully with the subtle saltiness and spiciness. This flavor along with a hint of maple sweetness creates an amazing salty sweet flavor. Soaking up this rich sauce, sweet rice noodles add a nice texture to complement the thick and creamy sauce. Once combined, the fragrant spiced noodles and rich, nutty sauce are splashed with the lime juice—the final touch to enhance flavor and to add some zest.

Health Benefits

Tossed with tender edamame and coated in a smooth peanut sauce, spiced peanut noodles are also full of easy-to-digest protein, thanks to the legumes. Peanuts and edamame provide essential amino acids along with folate, manganese, B vitamins and numerous essential nutrients. Surprisingly, peanuts contain antioxidants such as resveratrol, adding to their heart-healthy properties.

Also high in protein, vitamins, and minerals, edamame contain: magnesium, iron, calcium, phosphorous, potassium, and zinc. But they are not limited to these nutrients and provide a vast nutrient profile that is often underrated. This tender little bean is good for your bones, heart, and overall health. Besides being well known for a high protein content, edamame can help lower cholesterol and provide plenty of vitamin K1, folate, and thiamine. It also contains isoflavones, which are thought to lower the risk of certain cancers. Altogether, these high-protein ingredients along with the powerful combination of spices like turmeric, cumin, and ginger create a nutritious yet flavorful bowl of creamy spiced peanut noodles with a slight kick from the lime juice and spices.

Spiced Peanut Noodles
Print
Ingredients
  1. 4 cups cooked rice noodles
Sauce
  1. 2 tbsp. oil of choice
  2. 3 garlic cloves, minced
  3. 1/3 tbsp. ground ginger
  4. 1/2 tbsp. chili powder
  5. 1/4 tsp. ground cumin
  6. 1/4 tsp. turmeric
  7. 1/4 tsp. salt
  8. 1/4 cup maple syrup
  9. 1/4 cup creamy peanut butter
  10. 3 tbsp. rice vinegar
  11. 2 tbsp. lime juice
Add-ins
  1. 1/2 cup boiled edamame
  2. Sprinkle of salt and pepper
  3. Optional: 1/2 cup chopped red peppers and 1/4 cup fresh cilantro
Instructions
  1. Start by adding rice noodles to boiling water. Boil for 10 minutes, then strain and rinse under cold water or cook according to box instructions. Set aside noodles and prepare sauce ingredients. Also, boil shelled edamame if using and set aside with the noodles. Start making the sauce by sautéing garlic and oil in a medium sized skillet until fragrant and soft but not crispy. Add the ginger, chill, turmeric, salt then mix together. Next, add the maple syrup, peanut butter and rice vinegar and stir until all the ingredients combine and the spices are incorporated into the creamy sauce mixture. Toss in the rice noodles, cooked edamame, and optional ingredients to the skillet and stir ingredients over low heat until sauce is mixed into the noodles. Sprinkle with additional salt and pepper and serve with an extra splash of lime juice. enjoy!
Simple Sweets & Treats https://simplesweetsandtreats.com/

Veggie Rice & Creamed Garlic Sauce (V, GF)

Veggie rice & creamed garlic sauce makes for an excellent, quick lunch or light dinner that is both nourishing and satisfying. Coated in a creamy sauce, fresh or frozen cauliflower and broccoli are steamed until tender along with additional steamed veggies such as carrots and green beans. The vegetables are tossed with fluffy and fragrant basmati rice since it absorbs the sauce really well and is easy to digest, but any rice variety would be delicious. On top of the rice and veggies is a creamy sauce of steamed corn, fresh garlic, and pink salt–incredibly simple yet the flavors and consistency are amazing. For an alternate version, you could also substitute peas for corn and/or add some optional herbs and spices to accentuate the flavors. Topped with a splash of lemon juice, the flavor combinations in the sauce, steamed vegetables, and fragrant rice are heightened by the lemon’s acidity.

Besides tasting delicious, veggie rice & creamed garlic sauce is healthy yet nourishing and comforting. Thanks to cruciferous veggies, they offer anti-cancer nutrients such as a plethora of minerals, carotenoids, and folate as well as vitamins C, E, and K. Also, this high-fiber vegetable contains glucosinolates, the sulfur-rich compounds that have been studied for their cancer-fighting qualities (1).

While it may not look the most appetizing, this veggie rice & creamed garlic sauce is too good not to share. This super delicious bowl of tender veggies and rice pairs wonderfully with a creamy corn sauce (similar to this one) to create a simple meal that can be personalized to your liking. Considering the delicious, colorful tastes and health benefits of this meal idea, veggie rice with creamed garlic sauce is simple to assemble, yet vibrant and delicious.

Veggie Rice with Creamed Garlic Sauce

Veggie Rice with Creamed Garlic Sauce
Print
Rice
  1. 2 cups water
  2. 1 cup dry white basmati rice
Veggies
  1. 1 cup water
  2. 2 cups broccoli or cauliflower, steamed
  3. 1 cup mixed veggies of choice, steamed
  4. Salt and pepper to taste
  5. 2 tbsp. lemon juice
Corn Sauce
  1. 2 cups frozen corn boiled
  2. 1/2 cup cooking water
  3. 2 cloves garlic, minced
  4. 1 tsp. ground turmeric
  5. 1 tsp. ground ginger
  6. 1/4 tsp. oregano
  7. Pinch of salt and pepper
Instructions
  1. Boil water in a medium sized saucepan, add rice and simmer on low for 10 minutes until water is absorbed. Cover and let sit for 10 minutes. In a separate pan, boil water and add frozen corn. add a mesh steamer or steaming basket containing the vegetables and steam over low heat for 10-15 minutes or until vegetables have reached desired tenderness. Once the rice and veggies are done cooking, combine them in bowl. Add corn and 1/2 cup of cooking water to a high speed bender or food processor and blend on high until smooth. Add in the garlic, turmeric, ginger, oregano, and S&P, then blend on low. Add sauce over rice and veggies and top with salt and pepper to taste along with 2 tbsp. of lemon juice.
Simple Sweets & Treats https://simplesweetsandtreats.com/

1. National Cancer Institute. 2012. Cruciferous vegetables and cancer prevention. National Cancer Institute.
https://www.cancer.gov/about-cancer/causes-prevention/risk/diet/cruciferous-vegetables-fact-sheet

Lemon Blueberry Burst Cake (V & GF)

This moist lemon blueberry burst cake is bursting with flavor from tart wild blueberries and lemon zest. Lemon icing is drizzled overtop, as it sinks into the moist cake. Together, the tart blueberry and lemon flavor along with natural sweetness from the icing create an amazing tasting cake that is light, yet rich and decadent.

But unlike mosts cakes, this lemon blueberry burst cake is made without refined flours, sugars, or hydrogenated oils. It is also grain-free and dairy-free. By using coconut or almond flour, this substitutes regular flour. It also absorbs moisture really well so you don’t need to use as much flour for the same effect. Plus, it’s anti-inflammatory rather than high-glycemic like refined white flour, which can spark blood sugar and initiate inflammation. This lemon blueberry cake is a complete makeover of the refined traditional version, yet it tastes similar and remarkably sweet for being somewhat healthy.

A simple one-bowl recipe, the cake’s main ingredient involves coconut or almond flour, which absorbs moisture so well that you can get away with using much less (also saves on ingredient amounts, which is always great!). You can also use an all purpose wheat flour or gluten free flour, but make sure to double the amount since they don’t absorb as much moisture.

Lemon Blueberry Burst Cake:

Dry Ingredients:
1/2 cup coconut flour (double if using regular flour)
1/4 tsp. salt
1/2 tsp. baking powder

Wet Ingredients:
1/4 cup full fat coconut milk
3/4 to 1 cup water (start with 3/4 and add the extra water if too dry)
1/4 cup maple syrup
1 flax egg (1 tbsp. flaxmeal + 3 tbsp. water, whisked)
3 tbsp. coconut, brown, or white unrefined sugar
1 tbsp. oil of choice (avocado oil was used in this recipe)
2 tsp. vanilla extract
1 tbsp. fresh lemon juice
1 tsp. lemon zest

Icing:
2 cups powdered sugar
1 tsp. lemon zest
2 tbsp. fresh lemon juice
A pinch of pink salt

Directions:
Preheat oven to 350 degrees, then prepare a circular cake pan with parchment paper greased with oil of choice. Meanwhile, add coconut flour, salt, and baking soda to a large bowl and mix. Add all the wet ingredients to dry ingredients and mix until combined and there are no lumps remaining in the batter. Add the batter to a parchment paper-lined cake pan, and bake in a preheated oven for 30 minutes or until an inserted toothpick comes out clean. Let cool, and assemble the frosting by combining powdered sugar, pink salt, lemon zest and juice, then mixing until smooth. Drizzle icing over the cooled cake, top with fresh blueberries (or thawed frozen blueberries) and enjoy!

Cheesy Baked Pasta (Dairy-Free)

potatomac-17-of-25

potatomac-9-of-25

Baked pasta takes simple pasta to a much higher level. A little extra time to crisp in the oven allows for flavors to intensify and for a baked, crispy topping. In this cheesy baked pasta, the creamy sauce covered noodles bubble into this crisp topping as they meld together to create an amazing balance of creamy and crispy. This combination of baked crispness, creaminess, and cheesiness creates a pasta that tastes wonderful and is so satiating.

The topping of this cheesy baked pasta is made from chunks of bread coated in herb-infused olive oil. Digging into this crispy golden topping reveals noodles drenched in a creamy sauce that soaks into the olive oil coated breadcrumbs. But this pasta could actually be considered fairly nutritious, considering the secret sauce ingredient (buttery golden potatoes) is full of vitamins and minerals. It is also dairy free, thanks to this ingredient, and the noodles and breadcrumbs can be substituted for gluten free versions. It’s a great recipe for allergy-friendly comfort-food that is wonderfully cheesy, creamy, crispy, and satisfying. Thankfully, all you need are some simple ingredients to whip up a batch of this creamy, cheesy baked pasta.

potatomac-15-of-25

potatomac-22-of-25

Cheesy Baked Pasta

2 cups boiled chopped potatoes (Baby Dutch Yellow Potatoes were used in this recipe)
1/4 cup cooking water 
3 cloves garlic, minced
1/4 tsp. sea salt and a dash of black pepper
1/2 tsp. Italian seasoning
1/4 cup nutritional yeast

Breadcrumb Topping:
2 slices of sourdough bread (or a GF version), crumbled into chunks
3 tbsp. herb infused olive oil (Regular olive oil works too)
Additional sea salt and black pepper to taste

Cook noodles of choice until el dente, about 12 minutes. Meanwhile, boil the chopped potatoes in another pot for about 15 minutes. Drain the noodles and add them to a small casserole dish. Once the potatoes have finished boiling, add them to a high-speed blender or food processor along with 1 cup of the hot water. Add in the seasonings and blend on high speed until smooth. Pour this sauce over the noodles and mix. Now to assemble the breadcrumb topping, add chunks of bread to a pan and coat in olive oil and Italian herbs. Top with a sprinkle of salt and pepper. Next, bake the pasta and the breadcrumbs separately for 10 minutes at 350 degrees, then top the pasta with this topping and bake for an additional 10 minutes or until it has reached desired crispness.

potatomac-13-of-25

Golden Spiced Thai Noodles

curry-thainoodles-cntlpsmthie-17-of-34

curry-thainoodles-cntlpsmthie-25-of-34

curry-thainoodles-cntlpsmthie-24-of-34

The vibrant flavors of Thai cooking create amazing dishes like these golden spiced Thai noodles, which are light yet surprisingly filling and satisfying. The flavors of lime juice, spicy peppers and curry taste amazing when balanced with the subtle sweet flavors of coconut milk and rice. The coconut milk also cools the spiciness to create a wonderful balance of spiciness and creaminess. 

This recipe for Golden Spiced Thai Noodles incorporates wonderfully fragrant Thai spices into a simple noodle dish. Fragrant, hot, and subtly sweet, the creamy coconut sauce soaks into the soft Jasmine rice noodles. This tasty sauce combines aromatic spices with sweet coconut cream and spicy peppers. To accentuate these flavors, fresh lime juice is splashed into the sauce to bring out the flavors and to add some zest. Overall, these golden spiced Thai noodles are light and fresh yet comforting and nourishing–a healthy and delicious main dish or side.

It’s also a simple recipe to make that contains just a few ingredients plus spices. Simply cook up some rice noodles (They cook so quickly!) while making the sauce. Creating the sauce involves heating up spices,ginger, and garlic, then cooling everything down with some coconut milk and fresh lime juice. Top with optional tomatoes and Thai basil for additional freshness and flavor. 

curry-thainoodles-cntlpsmthie-16-of-34

curry-thainoodles-cntlpsmthie-23-of-34

Golden Spiced Thai Noodles

Golden Spiced Thai Noodles
Print
Ingredients
  1. 1 package or 8 oz. of rice noodles
  2. 1 tbsp. oil of choice
  3. 2 tbsp. vegetable broth
  4. 1 tbsp. minced ginger
  5. 1 tbsp. minced garlic
  6. 1/4 tsp. each of chili powder and cumin
  7. 1/2 tsp. favorite curry powder
  8. 1/4 tsp. paprika
  9. A pinch of sea salt and black pepper
  10. 2 tbsp. brown sugar or coconut sugar
  11. 1/2 cup coconut cream
  12. Optional fresh ingredients: Thai basil and chopped cherry tomatoes
Instructions
  1. Add rice noodles to boiling water for around four minutes. Let sit then assemble the sauce ingredients. Add the oil, vegetable broth, minced ginger and garlic, and the spices to a skillet or low pan and sauté for a few minutes until the spices are fragrant and the garlic becomes golden. Add in the coconut cream, brown sugar, and salt & pepper, while mixing over low heat just until warm. Drain the rice noodles, then add them to the sauce and toss until the noodles are evenly coated. Enjoy!
Simple Sweets & Treats https://simplesweetsandtreats.com/